The A2J Author Document Assembly Tool (“A2J DAT”)
Best Practices Guide for Creating Accessible PDF Templates
A2J Author understands the importance of accessibility and strives to empower authors to make their A2J Guided Interviews as accessible as possible. Accessible A2J Guided Interviews and templates are imperative to assist people who are mobility impaired, blind, low vision, deaf, hard of hearing, or who have cognitive impairments. However, addressing accessibility issues in A2J Guided Interviews and A2J Templates has the added benefit of making them more usable for everyone. To that end, we have implemented upgrades to move the A2J Viewer and the A2J Document Assembly Tool (“A2J DAT”) into compliance with WCAG and Section 508 standards. Through funding from the Legal Services Corporation’s TIG program and our partnership with Atlanta Legal Services, we have created this best practices guide to help authors create A2J DAT PDF Templates that make it easier for people with disabilities to use the templates. This guide will walk authors through the steps of making their underlying PDFs as accessible as possible to make the ultimate assembled document as accessible as possible. Concurrently with this best practices guide, we have created an HTML preview of the A2J DAT Text Templates. You can read more about that here. (INSERT LINK)
This best practices guide assumes authors have access to Adobe Acrobat Pro DC. That software tool allows you to edit the underlying PDF with an eye to accessibility. The team at Adobe has created tools within Acrobat Pro DC DC that allow you to check the accessibility of a PDF and have also created a User Guide. This best practices guide will focus on features of PDF documents most often seen in automated court forms. We recommend that you read the full User Guide, with a focus on the Accessibility, Tags, and Reflow section, found here: https://helpx.adobe.com/acrobat/using/create-verify-pdf-accessibility.html#make_PDFs_accessible.
There are four sections of this best practices guide:
This best practices guide will walk you through the process of reviewing your PDFs accessibility and addressing issues found in a typical form to be automated in A2J Author. We created the screenshots below using a sample court form based off of a real adult name change petition.
Add The Accessibility Tools
Acrobat Pro DC has a tool built in that reviews your document and prompts you to address accessibility issues. This is called the “Make Accessible Action”. When first downloading Acrobat Pro DC, the default settings did not include the Accessibility Tool or the Action Wizard Tool. You’re going to want to add them to your right hand toolbar for easy access
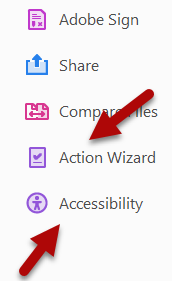
Figure: Action Wizard and Accessibility Tools added to right hand toolbar
To do so, go to the Tools section in the top navigation bar and search for “Action Wizard”. It’s under the “Customize” section of the Tools or you can use the built in search tools functionality. Click “Add” 
Make the PDFs Accessible
Once you’ve added those two new actions, you can run the first round of accessibility checks. The “Make Accessible” action checks your PDF for common accessibility issues like scanned text, form fields, tables, and images. It then tells you what common elements have passed the review and which need to be manually checked. To access it, click the “Action Wizard”. This opens up a secondary toolbar at the top and a secondary right hand toolbar.
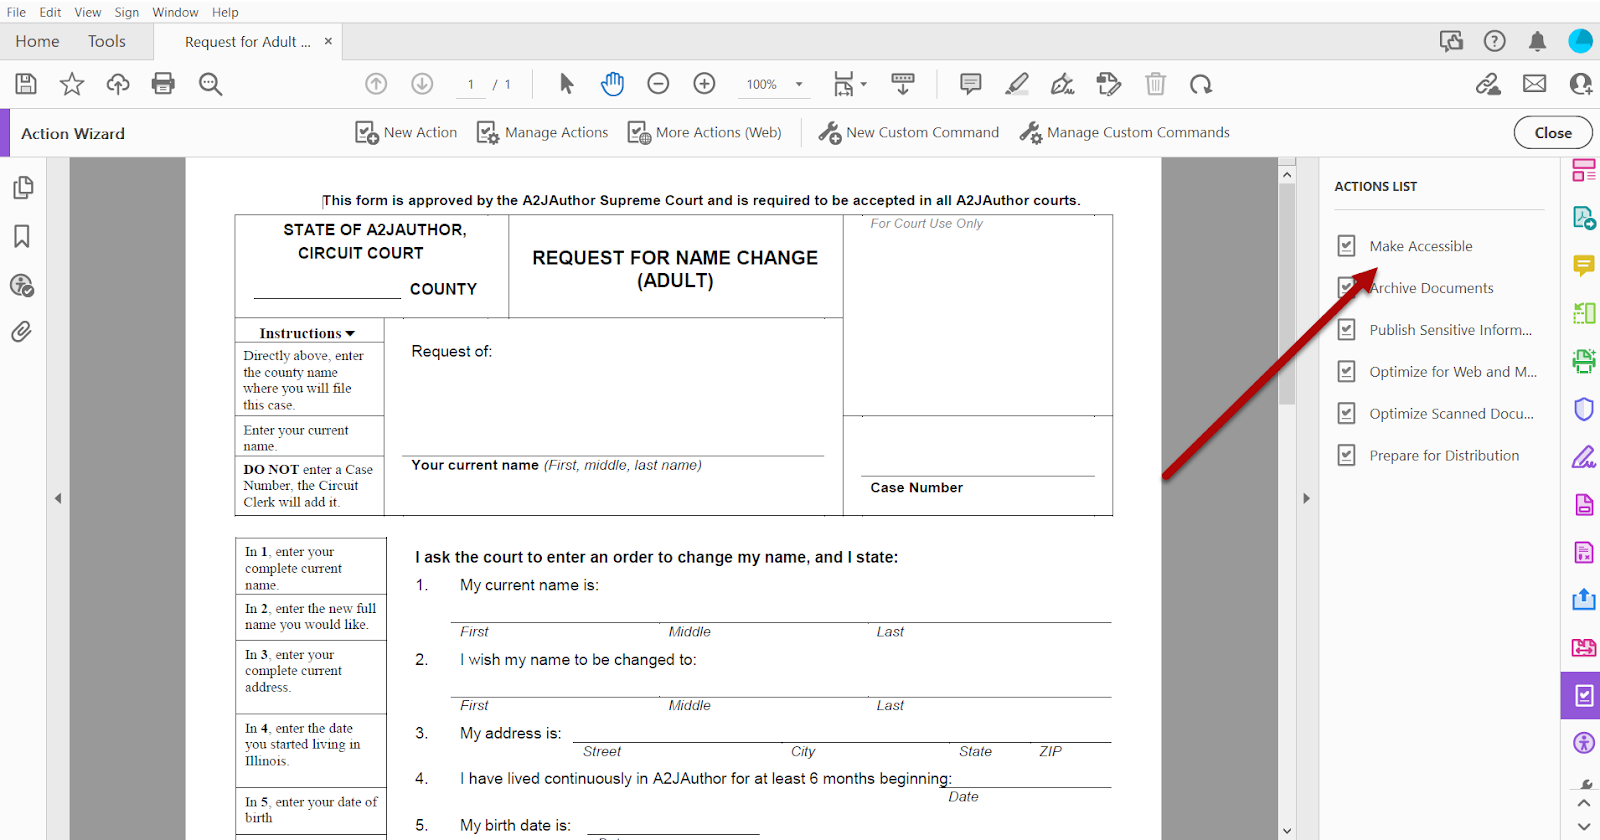
Figure: Make Accessible Action Inside the Action Wizard Secondary Toolbar
Click the “Make Accessible” option under the Actions List in the secondary right hand toolbar. This prompts you to select the document you would like to be reviewed. If you have a document open already, it automatically selects that one. Once you select your document for review, it will prompt you to:
-
Add a document description: Title, Subject, Author, and Keywords
-
Detect form fields - IMPORTANT: Don’t do this when creating accessible A2J DAT PDF Templates. The A2J DAT requires flattened PDFs. It does not work with pre-existing fields in PDFs.
-
Set tab order property
-
Set reading language: important for screen readers
-
Set alternative text: scan for images and flag any without alternative text
Once that has finished, the accessibility checker options will open.
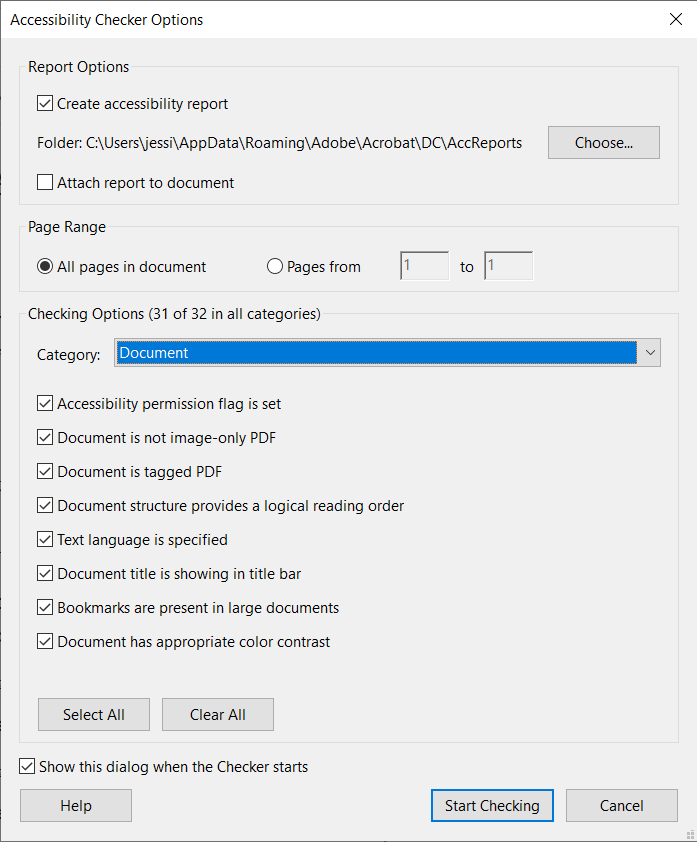
Figure: Accessibility Checker Options
Ensure “Select All” is chosen and then click “Start Checking”. Once the Accessibility Checker has run, the findings will appear in a left hand panel. In the sample document, the logical reader order and the color contrast needs a manual check. Everything else passed this initial review.

Figure: Accessibility Checker Review of Request for Name Change (Adult)
The Accessibility Checker displays four potential statuses for each line item: passed, skipped by user, needs manual check, and failed. With each item, you have the option to skip the rule, read an explanation of the rule, have Acrobat Pro DC check it again, show the report, or review the accessibility checker options.

Figure: Options for each item raised by accessibility checker
The “Show Report” option and the “Explain” option will be most helpful for you if you are unfamiliar with how to fix the accessibility issue. “Explain” will take you to the Accessibility section of the Adobe Acrobat User Guide that pertains to the issue with that item. For example, the sample document has a “needs manual check” for color contrast. Selecting the “Explain” option for that item takes us to this help article with tips for fixing the issue.
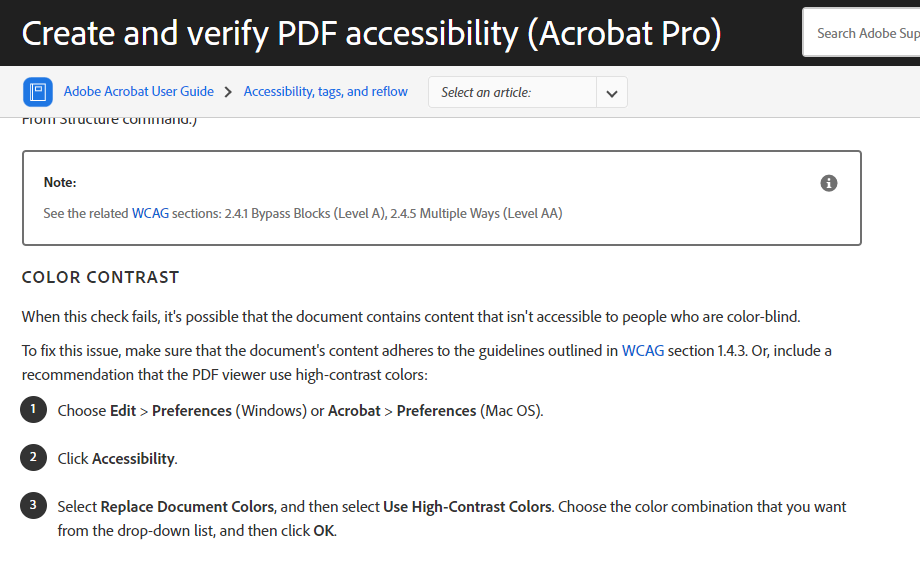
Figure: Tips within User Guide for fixing accessibility issues
You then make the changes suggested by the User Guide and select the “Check Again” option to ensure you’ve met that requirement. The user guide also contains references to the WCAG sections that create the standard you’re trying to hit. Alternatively, you can select the “Show Report” option and you’ll be taken to the Accessibility Report. From there you can click the hyperlinks within the items that your document failed or that require a manual check and be taken to the appropriate user guide sections. Once you fix all the items highlighted in your Accessibility Checker Report, run it again to verify.
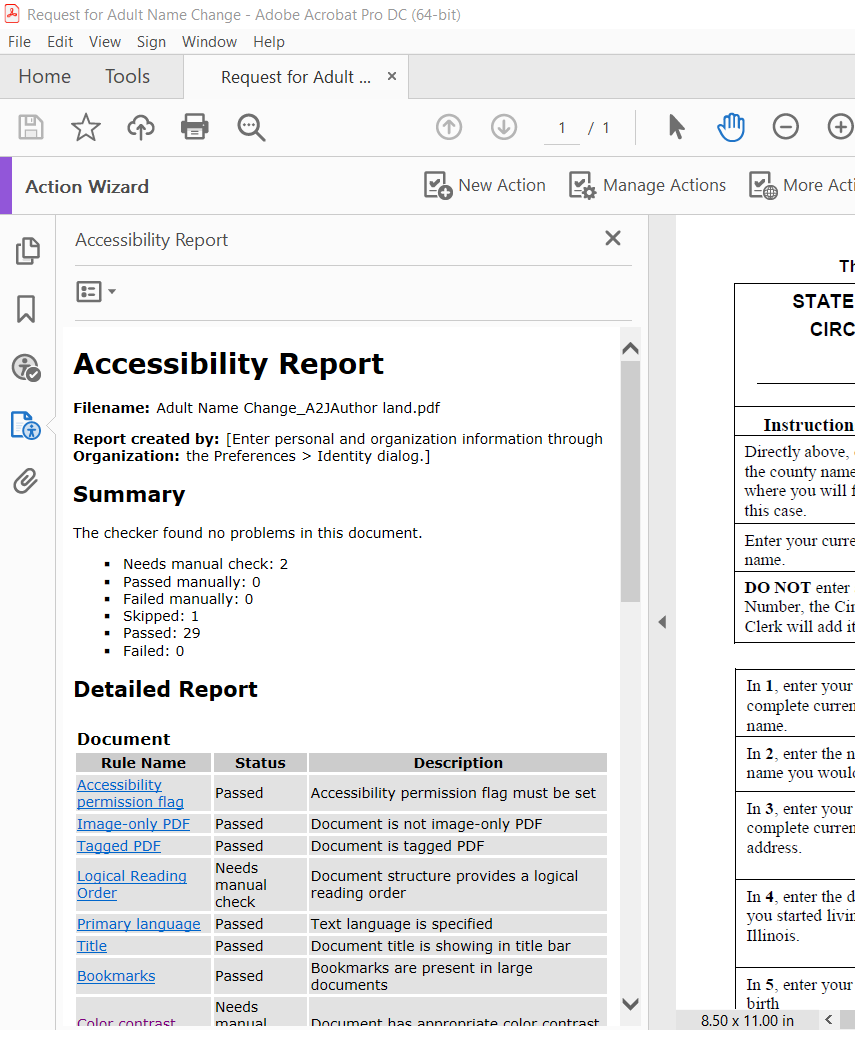
Figure: Accessibility Report in left hand panel
Common Accessibility Issues
Below we will cover some common accessibility issues. This is not an exhaustive list though. To find the complete list of accessibility issues and their fixes, check out the Adobe Acrobat User Guide linked above.
-
Logical Reading Order
This rule ensures that the tags used by the screen reader coincide with the logical reading order of the document. The structure of the underlying document is good for screen readers to properly read a PDF out loud, but it also makes it possible for a mobile device to correctly reflow and display the document on the smaller screen. You can see the reading order by clicking on the Accessibility icon in the right hand navigation panel, then clicking on “Reading Order”. The reading order is tagged on the document and can be changed using the “Reading Order” pop out modal.
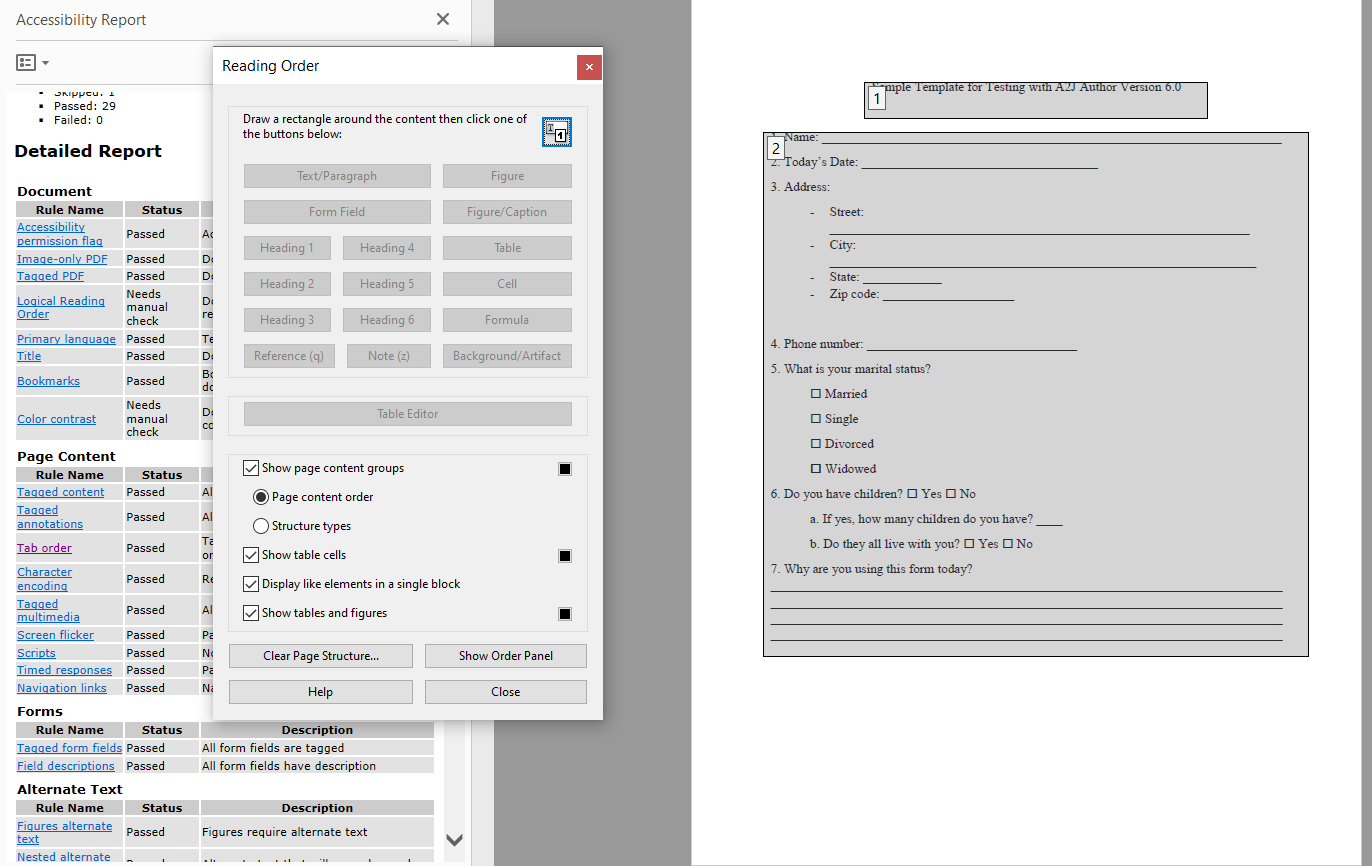
Figure: Reading Order shown on document and Reading Order pop out modal
-
Alternate Text for Images
All images should have an alternate text or be tagged as an artifact. The Accessibility Review will note all images that need alternate text. To add alternate text, click the “Set Alternate Text” option 
-
Tables, Headings, and Lists
Ensure that tables, headings, and lists are properly tagged as such. More information about the proper tagging can be found here: https://helpx.adobe.com/acrobat/using/create-verify-pdf-accessibility.html?trackingid=KACNN#TableRows
-
Searchable Text
If the original document was scanned as a PDF, these images of text are inaccessible to screen readers. Acrobat Pro DC automatically converts the scanned images of text to searchable text using optical character recognition (OCR) when you open the PDF for editing. Before beginning any other accessibility reviews, you should ensure that your document is in an editable text and image format. You can learn more about that here: https://helpx.adobe.com/acrobat/using/edit-scanned-pdfs.html
-
Document Language
Set the document’s language so that screen readers can switch to the appropriate language if necessary. During the initial Accessibility Checker Review, Acrobat Pro DC prompts you to do this automatically.
-
Document Properties
The security setting is set to Allowed for “Content Copying for Accessibility.” You can check and change the setting by going to File, then Properties (Ctrl + D), then Security.
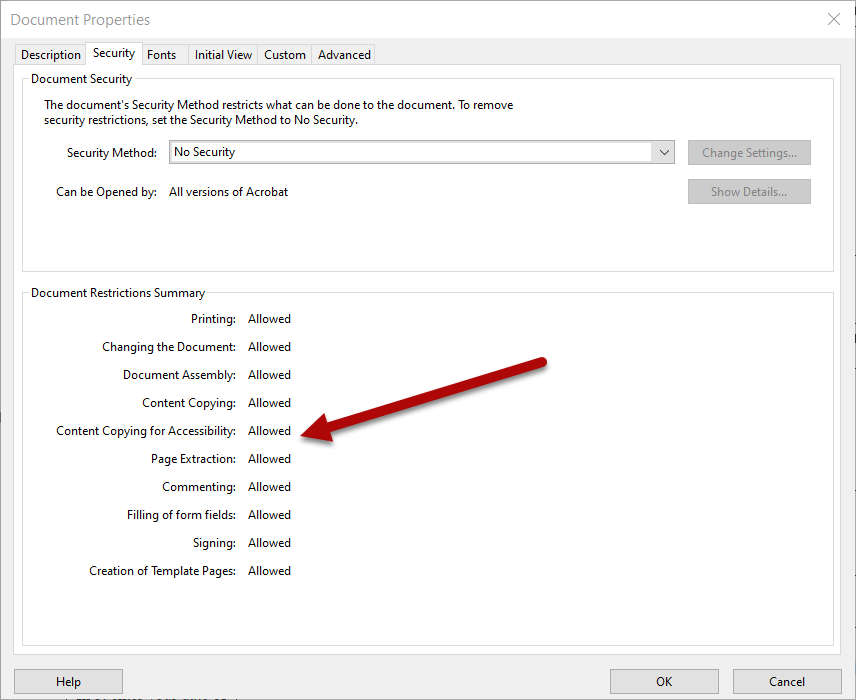
Figure: Security setting of Content Copying for Accessibility set to Allowed
-
Tab Order
Tab order is important because that is often how one navigates through the PDF. Your tab order should parallel the document’s structure. You can either automatically set the tab order or you can manually set it. To automatically set it, choose “Tab Order” on the Accessibility Checker panel and choose “Fix” from the Options menu. To manually change the tab order for links, follow the instructions here: https://helpx.adobe.com/acrobat/using/create-verify-pdf-accessibility.html?trackingid=KACNN#TabOrder
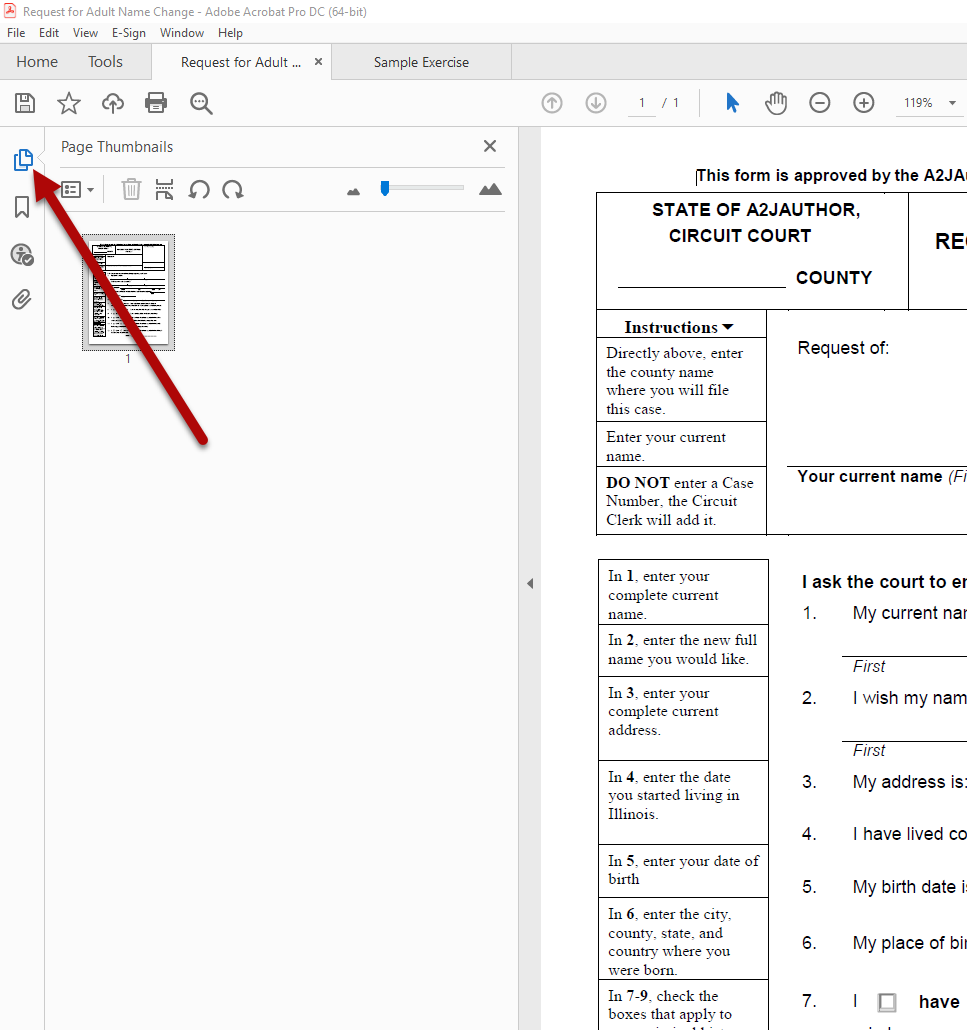
Figure: Page Thumbnails in Navigation Panel (for use when manually setting tab order)
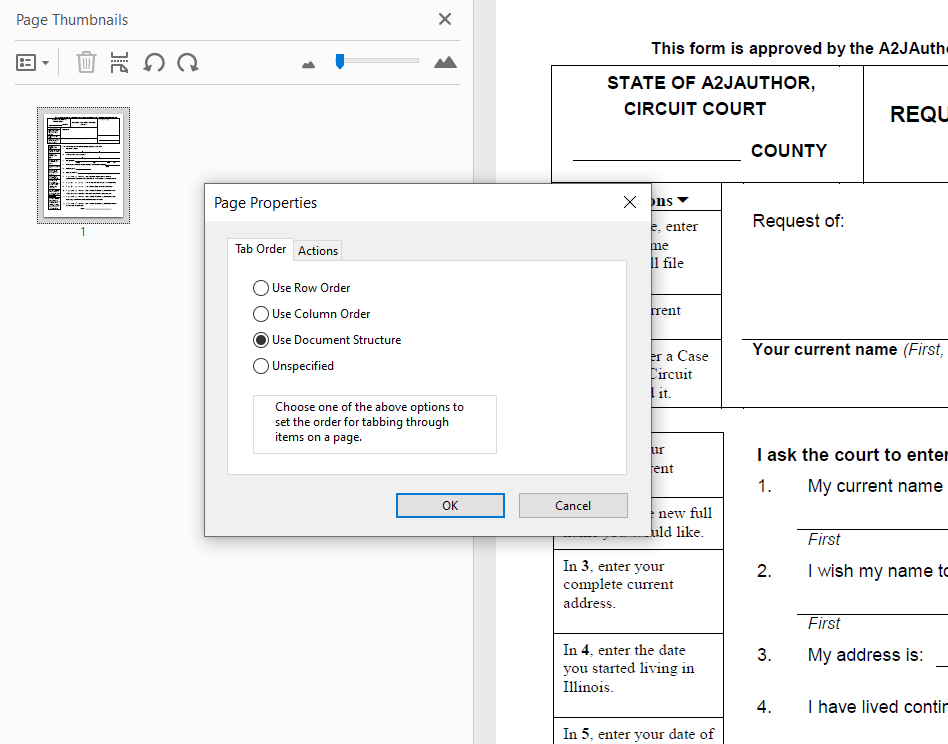
Figure: Manually setting Page Properties
Learn More
To learn more about creating accessible PDFs, check out these additional resources:
-
Adobe, Creating Accessible PDFs: https://helpx.adobe.com/acrobat/using/creating-accessible-pdfs.html
-
Legal Services National Technology Assistance Project (LSNTAP), Web Accessibility Toolkit for Legal Services Websites: https://www.lsntap.org/node/300/web-accessibility-toolkit-legal-services-websites
-
Adobe, Keyboard Shortcuts: https://helpx.adobe.com/acrobat/using/keyboard-shortcuts.html#keys_for_accessibility
-
Adobe, Accessibility Features in PDFs: https://helpx.adobe.com/acrobat/using/accessibility-features-pdfs.html#accessibility_features_in_pdfs
-
Department of Health and Human Services, Accessibility Compliance Checklists (download PDF Checklist): https://www.hhs.gov/web/section-508/accessibility-checklists/index.html
-
American Bar Association, ABA Best Practice Guidelines for Online Legal Document Providers: https://www.americanbar.org/content/dam/aba/images/news/2019/08/am-hod-resolutions/10a.pdf
-
Web Aim: https://webaim.org/
If you have any comments or suggestions for this document, please reach out to our A2J Author Project Manager, Jessica Frank, at Jessica@cali.org.